Nicki's collection of recipes, open for all friends, family, and anyone who wishes to share from his/her own collection!

Tag: cheese (Page 1 of 16)

Easy Thanksgiving Mac ‘n Cheese

So my bestie gave me an Instant Pot last December for Christmas.  It has sat in my living room floor for nearly a year because I was afraid of using it.  Silly, I know!  We started planning our departmental Thanksgiving lunch here at work and she suggested that I bring my IP and learn to use it and actually cook a dish rather than buy something to heat up.

Best suggestion ever.

I’ve been slowly saving up some recipes on my Copy Me That account and picked one by Pink that sounded like a good one for beginners.  And it was. Just. HELLA. EASY!

Instant Pot Mac and Cheese ⋆ by Pink

Recipe Source: by-pink.com

Ingredients:
16 oz dry macaroni noodles
4 cup water
16 ounces Colby and Monterrey Jack blend cheese
1/2 cup heavy whipping cream
1/2 cup sour cream
salt and pepper for serving

Instructions:
Put macaroni and water into your pressure cooker. The macaroni should be just covered with the water, if it isn’t add more water. Lock the lid and set for high pressure and 4 minutes. At the end of the 4 minutes use the quick pressure release method. Remove the lid and add remaining ingredients and stir till all the cheese is melted. There shouldn’t be much water left, if it is drain the water.

You can salt and pepper to taste but we didn’t need it.

Notes:
To make this instant pot mac and cheese in other cookers such as the Ninja foodi follow the directions.  For stovetop, cook your noodles as normal then follow the ingredients.

I followed the recipe to the letter except for the salt and pepper, and received rave reviews (even though I myself thought it was a bit bland).  I am thinking next time using some Pepper Jack cheese and a dash of Tabasco for a little heat and flavor.  Otherwise I had to admit, it was VERY easy and quite filling!  One of the guys in the department liked it so much that he asked if he could have what was left over to take home for dinner.  I’d call that a compliment!  🙂

Slow-Cooker Cheesy Potato Soup

I’ve seen this recipe in several places, but I think I saw it first by Betty. ^_^

Recipe Source: Betty Crocker

Ingredients:

Reynoldsâ„¢ Slow Cooker Liners
1 bag (32 oz) frozen southern-style diced hash brown potatoes, thawed
1/2 cup frozen chopped onion (from 12-oz bag), thawed
1 medium stalk celery, diced (1/2 cup)
1 carton (32-oz) Progressoâ„¢ chicken broth
1 cup water
3 tablespoons Gold Medalâ„¢ all-purpose flour
1 cup milk
1 bag (8 oz) shredded American-Cheddar cheese blend (2 cups)
1/4 cup real bacon pieces (from 2.8-oz package)
4 medium green onions, sliced (1/4 cup)

Directions:

  1. Place Reynoldsâ„¢ Slow Cooker Liners inside a 5- to 6 1/2 -qt slow cooker bowl. Make sure that liner fits snugly against the bottom and sides of bowl and pull the top of the liner over rim of bowl.
  2. In lined slow cooker, mix potatoes, onion, celery, broth and water.
  3. Cover; cook on Low heat setting 6 to 8 hours.
  4. In small bowl, mix flour into milk; stir into potato mixture. Increase heat setting to High. Cover; cook 20 to 30 minutes or until mixture thickens. Stir in cheese until melted. Garnish individual servings with bacon and green onions. Sprinkle with pepper if desired.

IMG_1583

IMG_1577

I’ve made this soup a couple times and love it. I didn’t use a liner this time, honestly my slow cooker is so easy to clean I don’t bother with liners anymore but I can see how someone who cooks every day with ’em will find them handy.

I omitted the celery and onions. I do add some smoked paprika and garlic powder to the flour and milk mixture. Also, I don’t thaw the hashbrowns. I take them straight from the freezer into the crock pot, and they’ve always been plenty done after 6 hours. Your mileage may vary of course. 🙂

Slightly sweet leftovers

One of the great things about crockpot recipes is that you can cook a decent amount of food all at once and have plenty of leftovers. Remember that Slow Cooker Sesame Chicken I made? I had about half of that left over and I found myself wondering whether to just freeze them to eat later or use them for something else. I took half of it and added some chili beans and taco seasoning for a sweet chicken burrito filling. I combined that with some sharp cheddar cheese, lettuce, fresh tomato, and sour cream. That covered another two meals and they were fantastic!

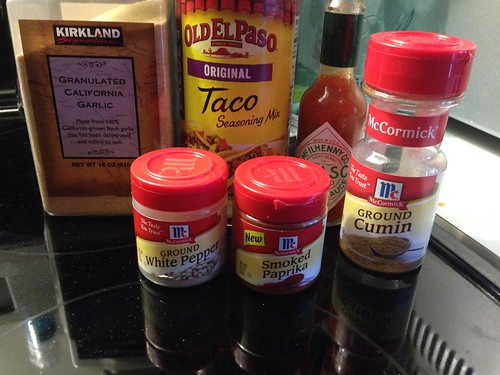
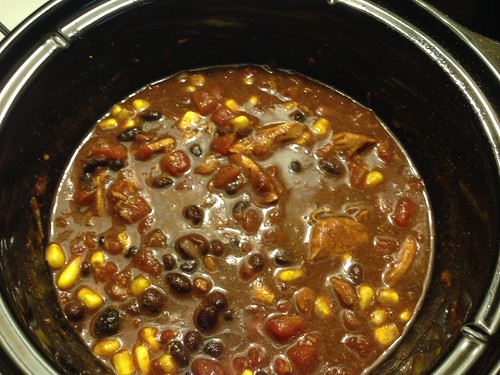
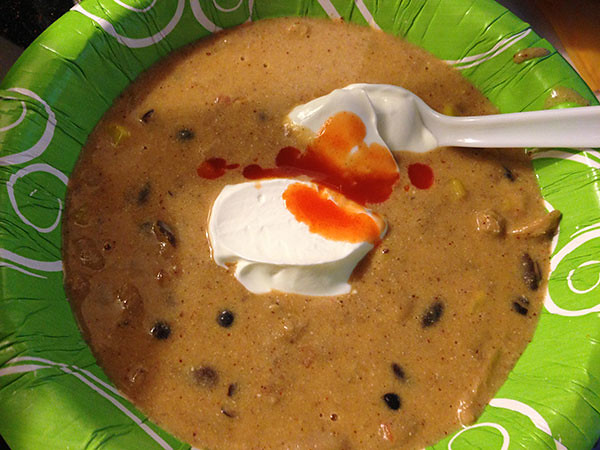
The last couple of days I’ve been craving some chili. I thought I’d try using what was left of the sesame chicken to make a slightly sweet chili. Using the Taco Soup recipe as a base, I combined the sesame chicken mix into my crockpot with a large can of diced tomatoes, two cans of chili beans, a can of black beans, about a cup of whole kernel corn (from the freezer), a packet of taco seasoning, a packet of Ranch seasoning, and a mix of the following to taste: Tabasco sauce, ground chili pepper, ground white pepper, ground cumin, garlic powder, smoked paprika, sea salt.

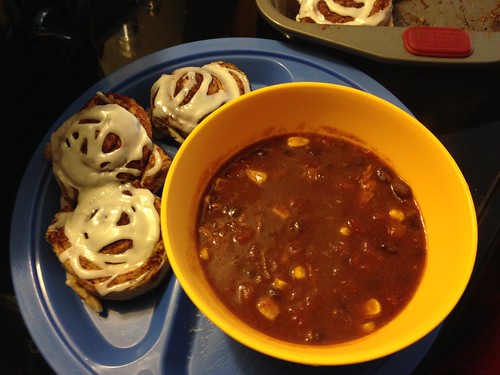
It was delicious! I do not have any “starting” images, but here’s the end result:

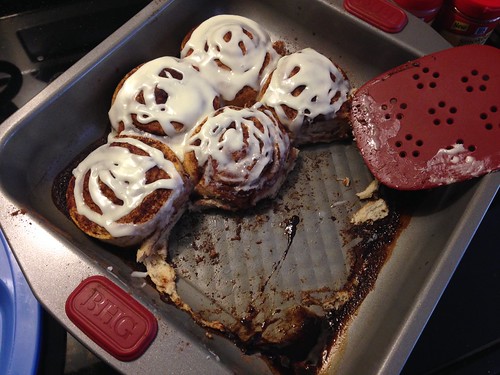
I served a bowl of the chili topped with a mix of white and mild cheddar cheese and sour cream, with cinnamon rolls which were soaked in vanilla bourbon just before baking. They were very sweet and I found complemented the meal nicely. 🙂

Creamy Cheesy White Chicken Chili

Ok, so I ran across this recipe on one of my favorite food blogs, Yammie’s Noshery. Her pictures that accompany the recipes always look soooooo good, and this recipe sounded so tasty I just had to try it!

So here’s the recipe as she posted it:

Creamy Cheesy White Chicken Chili

Recipe Source: yammiesnoshery.com

Ingredients:

1 Rotisserie Chicken, shredded
1/2 of a white onion, chopped
5 cloves garlic, minced
1/2 of a red bell pepper, chopped
7 oz. can of green chiles
8 oz. frozen corn
2 15.5 oz. cans white kidney beans (cannellini beans)
32 oz. chicken stock
1 teaspoon cumin
1 teaspoon chili powder
1/2 teaspoon garlic powder
1/8 teaspoon pepper
1/2 teaspoon salt
1/2 cup sour cream
4 oz. cream cheese
1/4 cup cornstarch
2 1/2 cups shredded cheese (I used a combination of pepperjack and monterey jack)
Cilantro and limes for serving

Directions:

In a large pot, saute the onion, garlic, and red bell pepper in a little bit of oil on medium heat until softened. Add the chicken, chiles, corn, beans chicken stock, cumin, chili powder, garlic powder, salt, and pepper and continue cooking until it comes to a simmer (if you prefer a non-creamy soup, it’s great at this point too!). Add the sour cream and cream cheese. Toss together the cornstarch and cheese and add to the pot. Continue cooking and stirring until thickened. Serve with cilantro and lime wedges.

I deviated a bit from the recipe:

  • I had only one can of cannellini beans, so I drained and rinsed a can of black beans too. I figured this would give it a bit more color, and I love them so. 🙂
  • I added 1/2 can of petite diced tomatoes that I had saved in the freezer from the last time I made chili. Doing this made it a bit darker in color, so it wasn’t really a true ‘white’ chili, but I love tomatoes and I was making this for me! 🙂
  • I used not quite all of the 32 oz. container of chicken stock so that the chili will be a bit thicker.
  • I omitted the onion, bell pepper, and chiles. I have weird food issues, this is one of them. 😛
  • I didn’t have any fresh garlic, so I doubled up on the garlic powder — this made it a bit TOO garlicky. I love the taste of garlic, but it was very strong.
  • Lastly, I omitted the cream cheese. It probably would have added to the “creamy factor” but I hate the taste. I may try substituting some velveeta next time.

This was my result:

All in all, this was a very good recipe. Leaving the chiles out left me wanting more kick, so I added some hot sauce when I served my bowl. The flavor was very good, I will try a bit more chili powder and add some white pepper next time to give it a bit more heat.

This was a nice thick chili. In fact, I’ve had its leftovers for breakfast this morning, and over tortilla chips as a snack! I think I may pair it with some refried beans in a chicken burrito for lunch tomorrow. This is definitely a chili I will fix again soon!

Alfredo Sauce

Nicki’s note: This is without a doubt the easiest and one of the tastiest recipes for Alfredo sauce I’ve made over the years. (and it does not have cream cheese!) Anyways, I’m re-posting this because it’s a recipe I use often, and … well, this is my site and I feel this recipe deserves some love. 🙂

I suggest making it as close to the recipe as possible. I add roasted garlic and a dash of white pepper to mine and it’s divine!

Recipe Source: copykat.com

Alfredo sauce is one of the most popular Italian sauces.

Many people rate Italian restaurants by their Alfredo sauce. Now you should know that Alfredo sauce isn’t hard to make. You can easily make a very tasty plate of pasta at home. The key is good quality ingredients. Don’t skip on the butter, heavy cream, and Parmesan cheese. While this dish may not be the healthiest choice in dining, it is a nice treat.

Do use good quality butter, and cream. I have found that buying them relatively close to before you make the dish is a good idea. Sometimes butter and cream can pick up flavors from your fridge. When it comes to the Parmesan cheese, be sure to use good quality cheese. If the cheese comes in a can, please use some fresh Parmesan cheese. You will be rewarded with a flavorful sauce if you do.

Ingredients:

1/2 C. Butter
2 C. grated Parmesan Cheese
1/2 C. Heavy Cream plus 2 Tbsp.
1 lb. dried pasta

Directions:

Prepare pasta according to package directions. While the pasta is cooking, melt the butter, heavy cream, and half of the Parmesan cheese, cook over low to medium heat. When the pasta is done drain and pour into a bowl. Then add the melted cheese mixture to the pasta. Combine and then add the remaining Parmesan cheese. If you like you can add some salt, and white pepper to season.

Mixing the sauce with the pasta is an Italian way to serve up this particular dish. It coats the pasta well, and gives you a delicious bit of sauce in every bite. You do not need to rinse your pasta. Following these directions you can make delicious Alfredo sauce at home.

Spaghetti Tacos

(Posted earlier to my personal blog)

As I was standing in front of my pantry last night waiting for culinary inspiration to hit me, Jessie made a suggestion for dinner: spaghetti tacos. She had gotten the idea from a recent episode of iCarly. At first I laughed (the show really is cute and I like to watch it with her), but the more I thought about it, the more I thought that it sounded pretty darned tasty! Granted, I cheated and used pre-made items, but it turned out great so I thought I’d share in case anyone else is looking for a new spin on an old family favorite.

You’ll need:

Jar of your favorite spaghetti sauce (or make your own)
Your favorite pasta
1 box of your favorite taco shells
Meat of choice, or meatballs
Cheese and/or other toppings of choice.

Steps:

Cook your pasta according to package directions. I made approximately 8 servings, using a mix of “regular” and wheat thin spaghetti noodles. This ensured that I would have made enough for everyone to get their fill, and would have plenty leftover for me to take with me the next morning for lunch! Next time I may use some medium-sized shells or perhaps angel hair.

While your pasta is cooking, cook your meat (or warm it if using pre-packaged) and set to the side. I used Tyson’s fajita chicken strips. These can be warmed in a skillet or in the microwave and are handy when I need to throw together a meal in a hurry. In a large skillet, combine your sauce and meat, and simmer until thoroughly warmed to desired temperature.

Warm your taco shells according to package directions. I used Old El Paso Stand ‘n Stuff shells. These things are handy because I can sit them down on a flat surface and stuff!

Once the shells are warmed, layer pasta, sauce, and desired toppings into your taco shell. We used Parmesan cheese, but I’ll be eating my leftovers today with a mix of Parmesan and sharp cheddar. 😀

The finished product:

I think next time I’ll add some salsa and/or hot sauce to give it some kick! 😀

Lasagna Soup

Recipe Source: Modified from a Betty Crocker recipe.

Originally called ‘Cheesy Lasagna Soup

Ingredients:

1 pound lean ground beef
1 medium onion, sliced
2 large green bell peppers, cut into 1-inch pieces
2 garlic cloves, finely chopped
2 cups water
1 can (28 oz) diced tomatoes with Italian herbs, undrained
1 can (6 ounces) tomato paste
2 cups uncooked pasta (4 ounces)
1 tablespoon packed brown sugar
1 1/2 teaspoons Italian seasoning, crumbled
1/4 teaspoon pepper
1 1/2 cups shredded cheese of your choice (6 ounces)

Directions:

Cook beef, onion, bell peppers and garlic in Dutch oven over medium heat 8 to 10 minutes, stirring occasionally, until beef is brown and onion is tender; drain.

Stir in water, diced tomatoes and tomato paste. Stir in pasta, brown sugar, Italian seasoning and pepper. Heat to boiling; reduce heat. Cover and simmer about 10 minutes, stirring occasionally, until pasta is tender.

Top with cheese and serve.

Cherry Glaze

This recipe (I think) came by way of my grandmother on my father’s side. This is my dad’s favorite holiday treat, and I know once my daughter tries it, it will become hers too! (that child LOVES cherry dishes!)

This is a photo of the recipe card that my mother has:

Little by little, I’m trying to get digital copies of the recipes that my mother has that I love …

Recipe Source: Carolyn Burton, Forestdale, AL

This is a layered dish.

First layer:

2 cups crushed graham crackers
1/4 cup melted butter or margarine

The easiest way I’ve found to crush the crackers, put them in a large ziplock bag and roll over pressing down with a rolling pin.

Combine butter and crackers and press into a 9×13 baking or casserole dish.

Second layer:

8 ounce package cream cheese
1 cup sugar

Whip cream cheese and sugar together and pour on top of graham cracker cracker crust.

Third layer:

3/4 cup chopped nuts (pecans usually work best)

Pour nuts onto cream cheese and sugar layer.

Fourth layer:

1/2 pint whipping cream (optional — I honestly think it tastes and looks better without this!)
1 can cherry pie filling

Pour filling on top of nuts layer and smooth out. Refrigerate then serve. To store, cover and refrigerate.

Jules’ Homemade Tomato Soup

Recipe Source: Everydaymommy.net

Ingredients:

2 cans (28oz) whole tomatoes or homegrowns
1-2 cans (14oz) beef or chicken broth
1 small yellow onion, finely diced
1-2 tbsp olive oil
1 cup Half & half
1/2 stick butter
1/2 tsp sugar
House seasoning to taste *

Directions:

In large soup pot saute diced onion in olive oil over medium heat till tender. Season with house seasoning to taste.

Blend the whole tomatoes in a blender until just smooth, only a few seconds. You’ll want a slightly lumpy consistency. Pour tomatoes into soup pot. Add broth to pot to a pleasing consistency. If you prefer a thicker soup add 1 can broth. If a thinner soup add 2 cans broth. Season again with house seasoning to taste. Simmer 10 minutes to allow flavors to combine.

Add half & half, sugar and butter. Stir well as butter melts. Simmer another 20 minutes. Serve with grilled cheddar cheese on rye bread. Yum!

* House seasoning is equal parts kosher salt, black pepper and garlic powder.

Cheesy Bacon Bites

Recipe Source: Ganet, Hueytown Baptist Church / Hueytown, AL

Ingredients:

1 can flaky buttermilk biscuits
8 oz. cream cheese
3/4 cup parmesan cheese
3 tablespoons chopped onions
1 jar real bacon bits
2 tablespoons milk

Directions:

Separate each biscuit into 3 layers. Press each layer into bottom of mini-muffin pans. Mix cheeses, bacon bits, milk, and onion; place a small amount on each biscuit. Bake for 15 minutes at 350 degrees F.

« Older posts

© 2024 Now We're Cookin'

Theme by Anders NorenUp ↑